Collection Instructions

How to Collect Your DripCheck Blood Sample

Collecting your DripCheck sample takes about 20 minutes. Register your kit, warm your upper arm, press the red button once, let the tube fill, then ship it with FedEx the same day, Monday through Thursday. Watch the video or follow the 24 steps below.

Getting Started

Watch the video walkthrough or swipe to see step by step instructions.

1Prepare your kitSteps 1 to 8

Part 1 of 4 · Prepare your kit

Step 1 - Register your kit
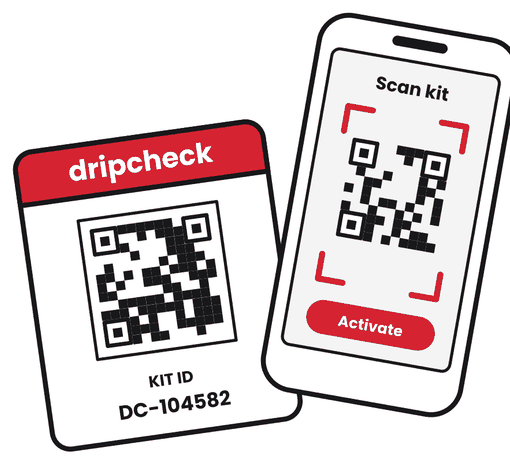
Step 1: Register your kit
CRITICAL STEP

Register your kit first. Scan the QR code on your kit with your phone camera. Your kit ID fills in for you. Enter your information and tap Activate.
Part 1 of 4 · Prepare your kit

Step 2 - Wash your hands and lay out the kit

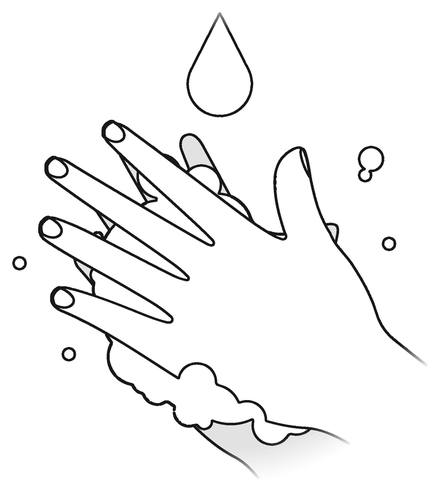
Step 2: Wash your hands and lay out the kit

Wash your hands. Take everything out of the kit and lay it on a clean table in front of you.
Part 1 of 4 · Prepare your kit

Step 3 - Fill out the collection card

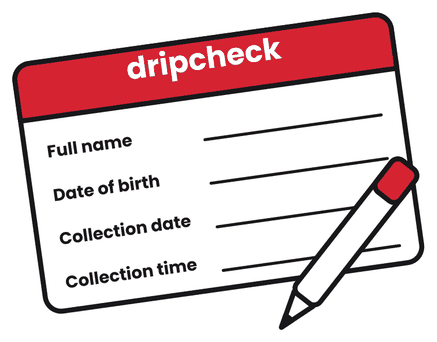
Step 3: Fill out the collection card
CRITICAL STEP

Fill out the collection card with your full name and date of birth.
Part 1 of 4 · Prepare your kit

Step 4 - Open your care items

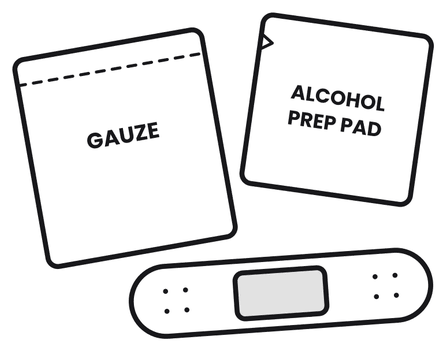
Step 4: Open your care items

Open your care items: the gauze, the alcohol wipe and the bandage. Set them next to you so they are ready.
Part 1 of 4 · Prepare your kit

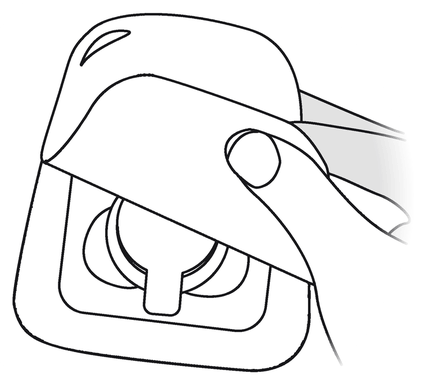
Step 5 - Take the device out of its tray

Step 5: Take the device out of its tray

Take the device out of its tray. Do not press the red button.
Part 1 of 4 · Prepare your kit

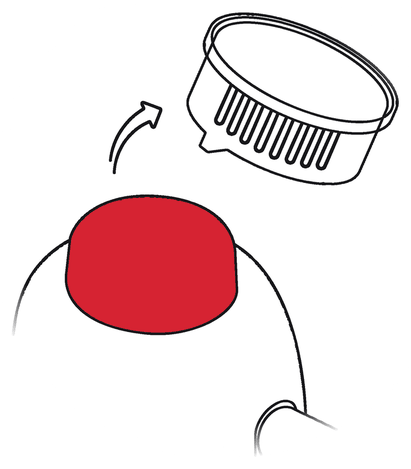
Step 6 - Remove the button cover

Step 6: Remove the button cover

Remove the clear cover from the red button. Do not press the button yet.
Part 1 of 4 · Prepare your kit

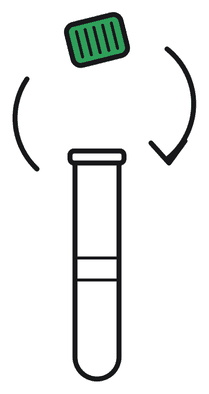
Step 7 - Uncap the collection tube

Step 7: Uncap the collection tube

Twist the green cap off the collection tube. Keep the cap. You will need it later.
Part 1 of 4 · Prepare your kit

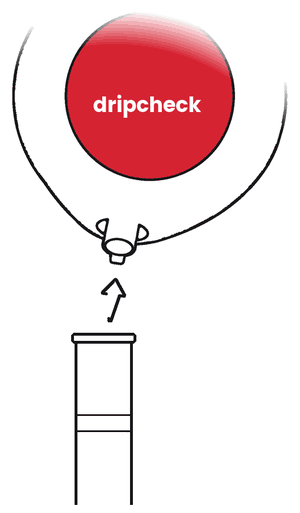
Step 8 - Attach the tube to the device

Step 8: Attach the tube to the device
CRITICAL STEP

Push the open end of the tube firmly into the bottom of the device until it is snug. The fill lines face you.
2Prepare your armSteps 9 to 11

Part 2 of 4 · Prepare your arm

Step 9 - Clean your upper arm

Step 9: Clean your upper arm

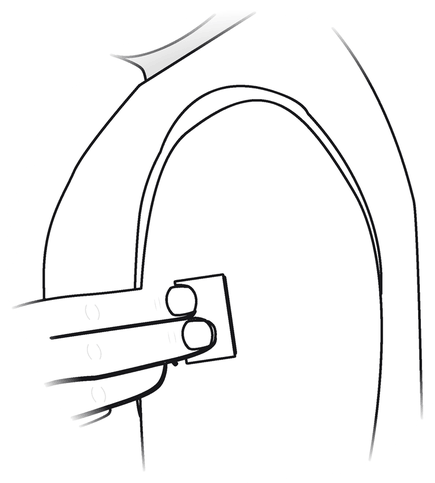
Clean the back of your upper arm with the alcohol wipe. Let it air dry.
Part 2 of 4 · Prepare your arm

Step 10 - Activate the heat pack

Step 10: Activate the heat pack

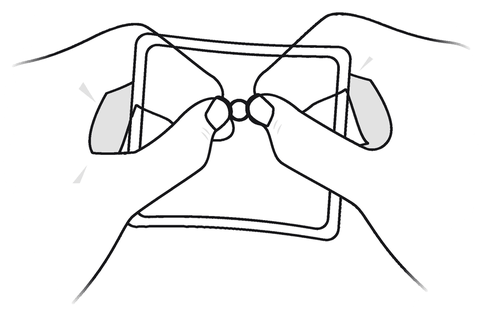
Activate the heat pack. Press the metal disc until it pops and the pack gets warm.
Part 2 of 4 · Prepare your arm

Step 11 - Warm your arm for 5 minutes

Step 11: Warm your arm for 5 minutes

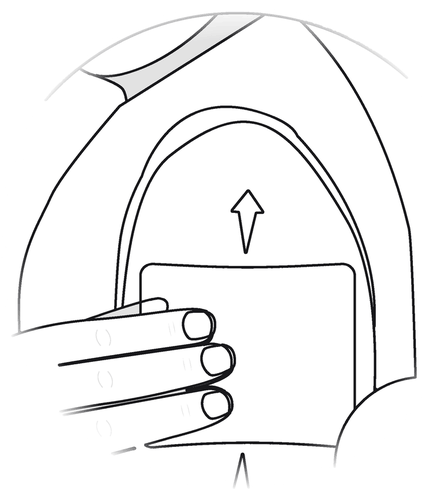
Hold the heat pack on your upper arm for 5 minutes. If it gets too hot, lift it for a moment. If it does not heat up, rub your arm instead.
5:00

3Collect your sampleSteps 12 to 18

Part 3 of 4 · Collect your sample

Step 12 - Apply the device to your arm

Step 12: Apply the device to your arm

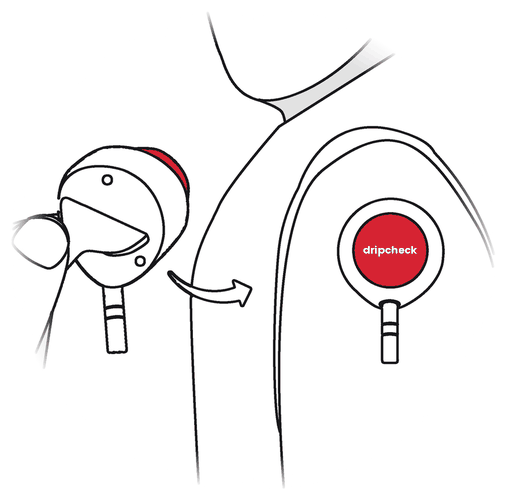
Peel off the sticker and press the device onto your upper arm. The tube points down. Let your arm hang loose and relax.
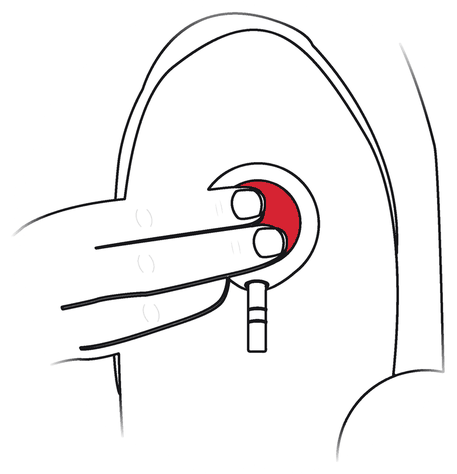
Part 3 of 4 · Collect your sample

Step 13 - Press the red button once

Step 13: Press the red button once
CRITICAL STEP

Press the red button all the way down with two fingers until you hear a click. Then let go. Press it only once.
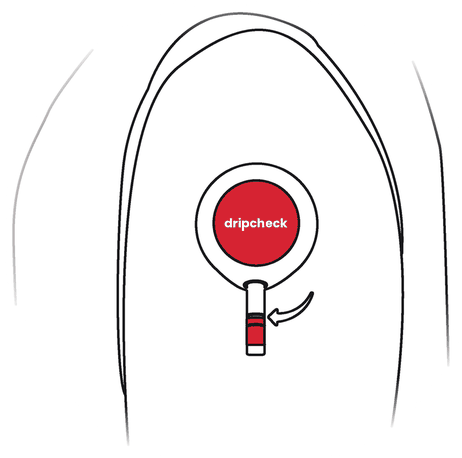
Part 3 of 4 · Collect your sample

Step 14 - Let the tube fill to the top line

Step 14: Let the tube fill to the top line
CRITICAL STEP

Wait for blood to fill the tube to the top line. This can take up to 5 minutes. Do not fill past the top line.
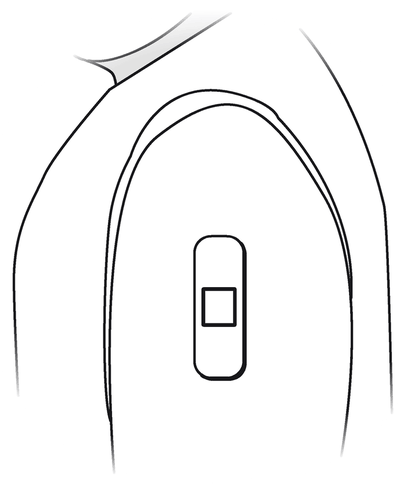
5:00
Part 3 of 4 · Collect your sample

Step 15 - Remove the device and bandage

Step 15: Remove the device and bandage

Peel the device off from one side and set it down with the red button facing down. Press the gauze on the spot for 1 minute, then put on the bandage.
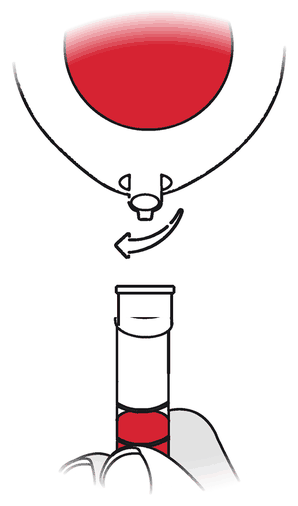
1:00
Part 3 of 4 · Collect your sample

Step 16 - Remove the tube

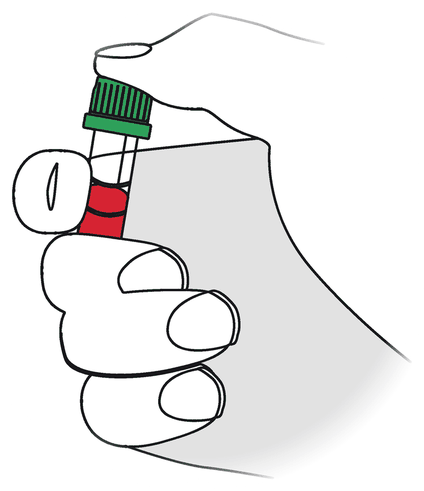
Step 16: Remove the tube

Twist the tube and pull it straight down out of the device. Do not pour any blood out.
Part 3 of 4 · Collect your sample

Step 17 - Cap the tube

Step 17: Cap the tube
CRITICAL STEP

Press the green cap straight down onto the tube until it snaps into place. Do not twist it.
Part 3 of 4 · Collect your sample

Step 18 - Turn the tube 10 times

Step 18: Turn the tube 10 times
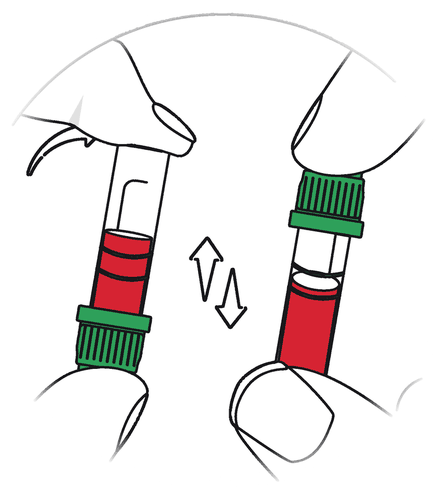
CRITICAL STEP

Gently turn the tube upside down 10 times. Do not shake it.
4Pack and shipSteps 19 to 24

Part 4 of 4 · Pack and ship

Step 19 - Write the date and time on the card

Step 19: Write the date and time on the card
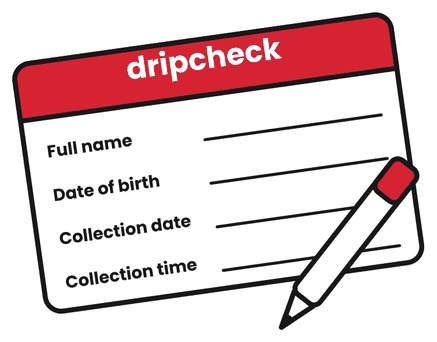
CRITICAL STEP

Write the collection date and time on the collection card.
Part 4 of 4 · Pack and ship

Step 20 - Pack the specimen bag

Step 20: Pack the specimen bag
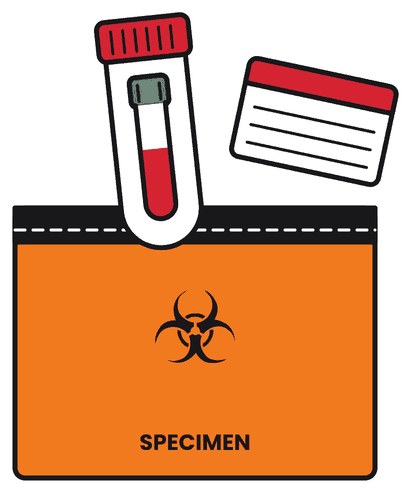
CRITICAL STEP

Put the tube in the clear tube with the red cap and screw the cap on tight. Put it and your collection card in the orange specimen bag. Press the bag closed.
Part 4 of 4 · Pack and ship

Step 21 - Seal the FedEx mailer

Step 21: Seal the FedEx mailer

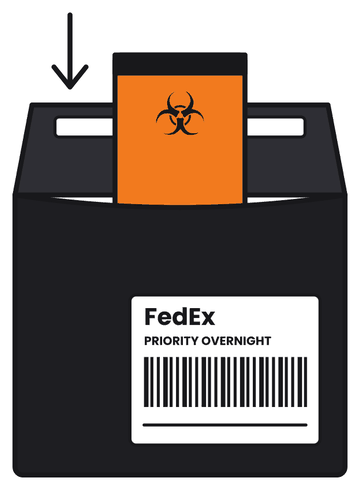
Put the sealed orange bag in the black FedEx mailer. Peel the strip and press the flap closed to seal it.
Part 4 of 4 · Pack and ship

Step 22 - Drop it off at FedEx

Step 22: Drop it off at FedEx
CRITICAL STEP

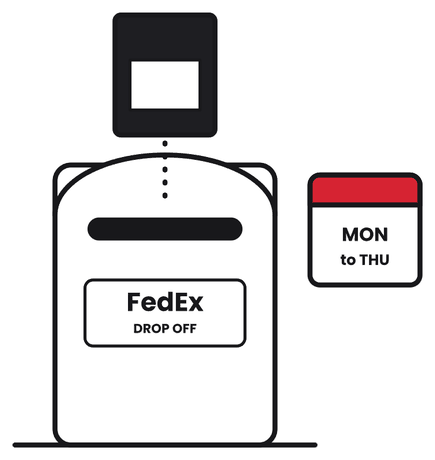
Drop the envelope at any FedEx location the same day you collect. Ship Monday through Thursday only.

Find a FedEx location
Part 4 of 4 · Pack and ship

Step 23 - Throw away the device and wash your hands

Step 23: Throw away the device and wash your hands

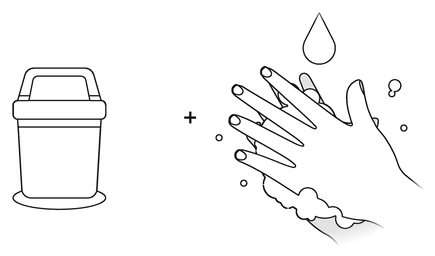
Throw away the used device and wrappers in your trash, then wash your hands. You are done.
Part 4 of 4 · Pack and ship

Step 24 - Watch for your results

Step 24: Watch for your results

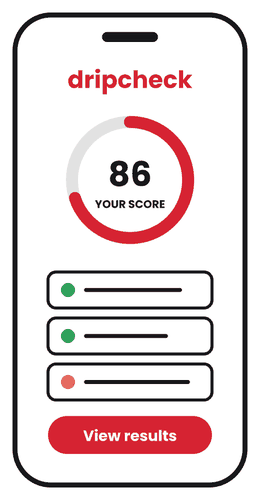
Your sample is on its way to the lab. We will text you when your results are ready in your DripCheck portal.

Go to your portal

What is in your kit

  • Collection device
  • Collection tube with a green cap
  • Collection card
  • Gauze, alcohol wipe and bandage
  • Heat pack
  • Clear protective tube with a red cap
  • Orange specimen bag
  • Black prepaid FedEx mailer

Every part of your kit is single use.

Collection questions

How long does the DripCheck blood collection take?
About 20 minutes from start to finish. That includes 5 minutes to warm your arm with the heat pack and up to 5 minutes for the tube to fill.
Where on my body do I collect the sample?
On the back of your upper arm, between your shoulder and elbow. Clean the spot with the alcohol wipe and warm it with the heat pack first.
What if blood does not appear right away?
That is normal. Blood can take a minute or two to show in the tube. Keep your arm relaxed and hanging down. Remove the device at 5 minutes or as soon as blood reaches the top fill line.
What if the heat pack does not get warm?
Rub your upper arm up and down with your hand for about 2 minutes instead. Warm skin helps blood flow.
Can I press the red button more than once?
No. Press it all the way down one time only, until it clicks. If the tube does not fill, contact DripCheck support before you do anything else.
Which days can I ship my sample?
Monday through Thursday only. Drop the sealed FedEx mailer at any FedEx location the same day you collect so it reaches the lab quickly.
Do I need to register my kit before I collect?
Yes. Scan the QR code on your kit with your phone camera, enter your information and tap Activate. Registering links your sample to you so the lab can report your results.
How will I get my results?
We text you as soon as your results are ready. You see them in your private DripCheck portal.

Need help? Contact DripCheck support or read the full FAQ.

If you feel unwell during collection, stop and seek medical care.